


Learning the art of tiling may be quite fulfilling as it is a transformative technique that changes environments. The process calls for expertise, perseverance, and a strong eye for detail, whether you’re installing new tiles in your kitchen or installing bathroom tiles in a London residence. We’ll walk you through all the necessary procedures and methods in this tutorial to make sure your tiling project turns out well.
Understanding Tile Installation Basics
Tile installation is more than just sticking tiles onto a wall or floor. It’s about understanding the space, the materials, and how they interact. The type of tile, adhesive, and the environment they’re being installed in all play a crucial role in the longevity and appearance of the finished product. The key to successful tile installation is precision and planning. Rushing through or skipping steps can lead to a less than satisfactory result. Additionally, considering factors like moisture levels and the room’s function is essential. For instance, bathrooms require moisture-resistant materials, making the choice of tiles and adhesive even more critical.
Preparation Before Tiling
It’s important to prepare before any tiles are applied to the surface. Make sure the space is dry, clean, and level. It’s necessary to fix any unevenness or fissures. Before beginning, gather all required equipment and supplies, such as adhesives, spacers, cutters, trowels, and of course, the tiles of your choice. An excellent installation is predicated on proper preparation. It’s crucial to take the kind of substrate you’re using into account. To ensure that the adhesive adheres well and the tiles lay level and securely, different surfaces might need different treatments or materials.
Additional preparation steps include
Priming the Surface: Applying a primer can significantly improve the adhesion of tiles to the surface, especially in areas prone to moisture.
Checking Tile Sizes: Due to slight variations in manufacturing, check the size of your tiles to ensure consistency throughout the installation.
Organising Tiles by Batch: Tiles from different batches may have slight colour variations. Mix them to avoid noticeable differences.
Dry Layout: Laying out your tiles dry before installation helps visualise the final look and identify potential issues.
Calculating Tile Expansion: Remember to account for tile expansion due to temperature changes, especially in larger rooms.
Sealing Natural Tiles: If using natural stone tiles, seal them before installation to protect them from stains and damage.
Waterproofing in Wet Areas: In bathrooms or wet areas, applying a waterproof membrane is crucial to prevent water damage.
Safety First: Wear appropriate safety gear, including gloves and eye protection, during the preparation and installation process.
These additional steps ensure a smoother tiling process and can significantly enhance the durability and appearance of your tiled surface.
Measuring and Planning
Accurate measurements are vital in tile installation. A common mistake is underestimating the amount of tiles and adhesive needed. Measure the space carefully, and plan the layout before you begin. This step helps in minimizing cuts and wastage and ensures a balanced look, especially critical in areas visible like bathroom tiles London homes where aesthetics is key. Remember to account for grout lines in your measurements and consider how different tile sizes and shapes will affect the overall pattern. Planning for borders or decorative elements at this stage can also save time and ensure a more pleasing final appearance.
Selecting the Right Tiles
Selecting the appropriate tiles can be difficult, but it’s necessary if you want your project to succeed. For example, non-slip, moisture-resistant tiles work well in bathrooms. Take into account the tiles’ dimensions, hue, and texture, as well as how they enhance the room. Keep in mind that the tiles you select should be useful for the space they will be employed in in addition to having a nice appearance.
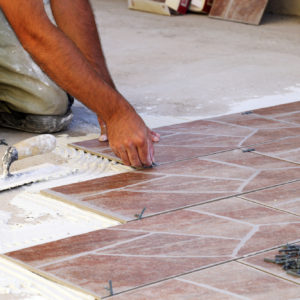
Image Sources : Danny Deco Uk
Mixing Adhesives and Grouts Correctly
The tile and surface must have a solid relationship. You can accomplish this by properly combining your grout and glue. Pay close attention to the manufacturer’s directions. Its consistency needs to be just right to hold the tile in place without letting too much grout show through the lines.
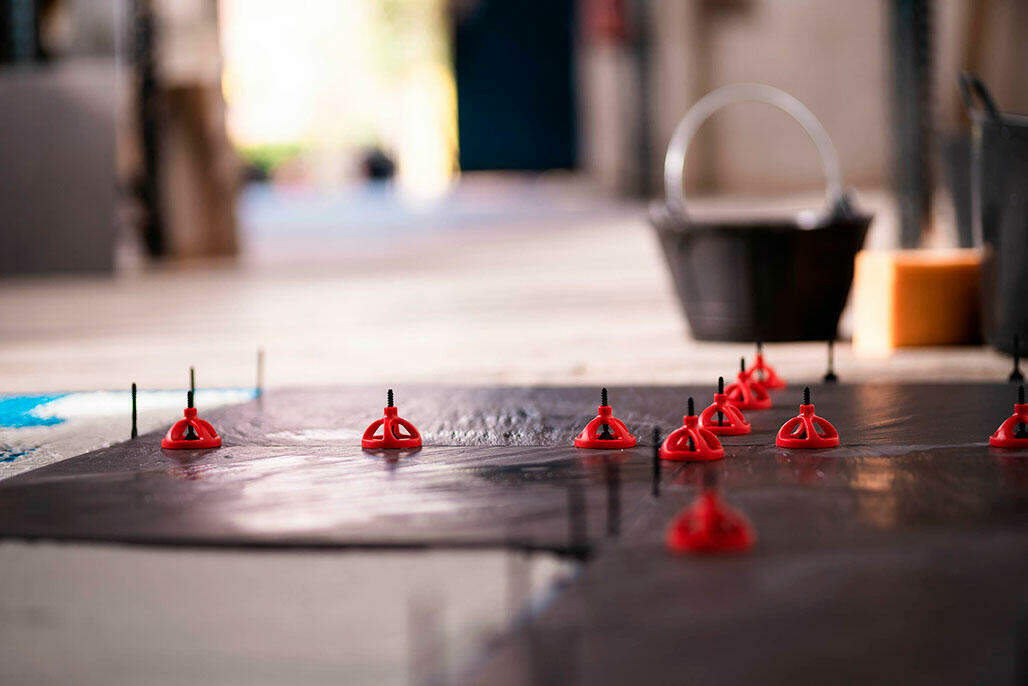
Tile Levelling and Alignment
To achieve a professional look, your tiles must be level and well-aligned. Tile levelling systems can be a great investment to avoid lippage, ensuring each tile is set at the same height. Patience is key here; take your time to adjust each tile until you’re satisfied with the alignment.
Applying Grout and Finishing Touches
Once the tiles are set, it’s time for grouting. Grout fills the spaces between the tiles and adds to the overall aesthetics. Apply it evenly and wipe away excess. Once dried, a final clean will reveal the beauty of your tiling work. Seal the edges where the tiles meet other surfaces to prevent water damage, especially in bathrooms.

Image Sources : Danny Deco Uk
Maintenance and Care for Tiled Surfaces
To keep your tiles looking new, regular maintenance is key. This includes cleaning with the right products and avoiding harsh chemicals that can damage the tiles or grout. For bathroom tiles, especially in a city like London where water hardness can be an issue, this is particularly important.
Troubleshooting Common Tiling Problems
Even with careful planning, issues can arise. Common problems include tiles not sticking, grout cracking, or tiles being uneven. Most of these can be fixed without starting over. For instance, a tile that’s not sticking may just need more adhesive or a different type. It’s important to identify the root cause of these issues to apply the right solution. Here are some additional tips:
Tiles Lifting After Installation: This may be due to insufficient adhesive or incorrect adhesive type. Ensure you’re using the right adhesive for your tile type and surface.
Grout Discolouration: This can occur when exposed to moisture or chemicals. Use a sealant to protect the grout and maintain its colour.
Hollow Sound Under Tiles: This suggests poor adhesion. Removing the loose tiles and reapplying them with the correct adhesive should solve the problem.
Cracked Tiles: This often results from movement in the substrate. Using a decoupling membrane can prevent this in future installations.
Uneven Grout Lines: Careful use of spacers and consistent pressure when laying tiles can prevent this common issue.
Remember, proper preparation and choosing the right materials are key to avoiding many of these problems. If you’re in doubt, consulting a professional tiler can save time and ensure a quality finish.
Conclusion
Tile installation, a meticulous yet rewarding endeavour, can profoundly transform any space. Embracing this task requires dedication, precision, and patience. The key to success lies in thorough preparation and meticulous attention to detail, whether you’re updating bathroom tiles in a London property or creating a stunning kitchen backsplash. If you ever find the project’s scale or complexity daunting, Danny Deco is at your service. With our extensive experience and commitment to excellence in tile installation, we guarantee a finish that not only meets but exceeds your expectations. Let these tips guide you, and remember, whether you’re a DIY aficionado or prefer professional assistance, the journey to a beautifully tiled space is well worth the effort.