


Carving a rocking chair is a rewarding woodworking project that blends craftsmanship, design, and ergonomic shaping. Whether you’re building a classic Windsor style or a sculptural modern rocker, rocking chair carving plays a central role in shaping comfort and character. With the right workflow and quality tools, you can transform raw lumber into an elegant, functional piece. In this guide, we’ll walk through a step‑by‑step process using precision tools such as Kutzall power-carving attachments and traditional shaping implements.
Planning and Preparation
Before any cutting begins, start with a clear plan. Sketch your design or use a template for reference, noting the dimensions of the legs, seat, backrest, and rockers. Choose a hardwood species like oak, maple, walnut, or cherry for strength and durability. Mark the grain orientation clearly, as the grain direction drastically affects how the wood cuts and carves.
Safety gear is essential. Always wear eye protection, a respirator or dust mask, and ear protection. Secure your blank firmly in a vise or clamps to prevent movement. 
Rough Shaping the Components
Begin by cutting the rough outlines of chair parts from your board stock using a bandsaw or jigsaw. Establish basic profiles for the seat, back, and rockers. At this stage, the focus is on removing the bulk of excess wood to approximate the desired shapes.
Once the parts are cut, you can begin the initial shaping. For large material removal and flowing curves, start with aggressive tools such as the Kutzall Original Carving Disc – Coarse or the Kutzall Extreme Carving Disc – Medium, mounted on an angle grinder. These tungsten-carbide-coated discs excel at rapid stock removal while maintaining control over the cut. They allow you to define armrests, seat contours, and rocker curves with smooth, predictable action.
Work systematically across the chair components, stepping back often to assess symmetry and flow between parts. Use light passes rather than forcing the tool to avoid tear‑out, especially on areas aligned with the grain.
Refining Curves and Details
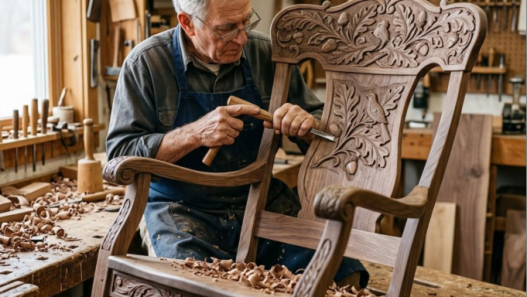
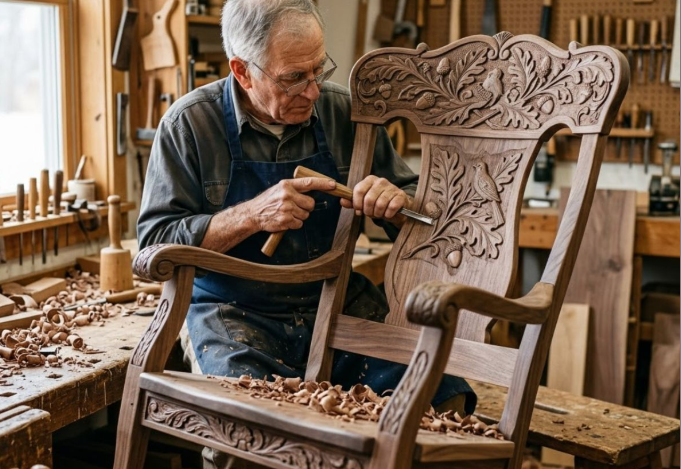
After the basic form is established, switch to more precise shaping tools to refine curves and ergonomic surfaces. Burrs and smaller attachments such as Kutzall 4‑Piece Rotary Burr kit, Kutzall Original Taper Rotary Burr 18″ shaft fine, or Kutzall Original Sphere Burr are ideal for sculpting nuanced contours and hollowing concave areas like the chair seat depression. These tools are compatible with Dremel or die grinders and provide finer control for shaping complex areas.
To achieve smooth transitions between high and low points, use hand‑held shaping tools as well. Kutzall Original 6″ Warding Hand Rasp Coarse and Kutzall Original Half‑Round hand rasp help even out surfaces, remove tool marks, and refine edges where power tools may be too aggressive. Hand rasps allow multi‑directional shaping and add tactile feedback when contouring delicate elements such as armrest curves.
Sanding and Surface Preparation
Once the major shaping is complete, remove all tool marks with progressive sanding. Start with a low‑grit (60–80) sandpaper to remove heavy marks, then move up through higher grits (120, 180, 220) to achieve a smooth finish. Sand with the grain to avoid cross‑grain scratches that require rework.
Assembly and Finishing
With the carved components prepared, assemble the chair using traditional joinery techniques such as mortise-and-tenon, dowels, or screws with reinforcing elements. Dry fit first to check alignment and fit. Once assembled, give the entire chair a final sanding pass to unify surfaces.
Apply a finish that protects and enhances the wood. Options range from oil‑based finishes like Danish oil to polyurethane or lacquer, depending on the look you want and the chair’s intended use. Multiple thin coats with light sanding between applications typically yield the best result.
Conclusion
Carving a rocking chair is an artful balance of planning, shaping, and finishing. By following a structured workflow from rough shaping to fine detail refinement, you can achieve a result that is both beautiful and comfortable. Selecting the right tools, such as high‑quality power carving wheels and burrs, makes the process more efficient and enjoyable. Whether you’re carving pronounced contours or subtle ergonomic surfaces, employing well‑designed power carving tools for wood enhances precision and craftsmanship, allowing your creativity to shine through every curve and contour.